Discover the essential Zoom settings for podcast recording. Zoom is one of the most popular platforms for podcast interview recordings. This is because it’s easy to use, it’s friendly to beginners, and most of the people you’ll be interviewing are already familiar with it.
What Zoom isn’t though, is the best option in terms of recording quality – that goes for both video and audio.
This is because Zoom records over the internet, and applies a lot of processing to the recordings which reduces the sound quality. There are Zoom settings for podcast recording that you can apply though, which will greatly increase the quality of your audio and video.
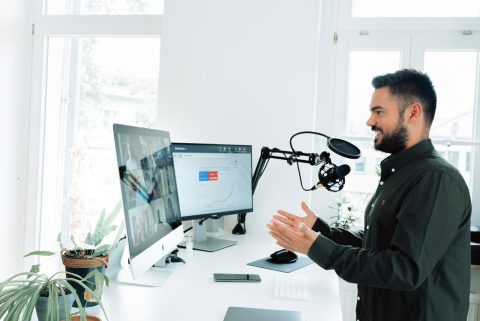
Let’s dive in and find out what those settings are! Just to note, if you’ve got a poor-quality microphone no settings are going to make it sound great. So upgrading your microphone is essential. Check out our recommendations here.
At the end, we’ll also share a recording tip that will allow you to greatly increase your audio quality even further without having to pay for another service.
Audio Settings
So, let’s open up the settings menu in Zoom by clicking on your initials in the top right of the screen and clicking Settings, or by clicking the cog icon. You’ll need the desktop version of Zoom to follow along, which you can download here.
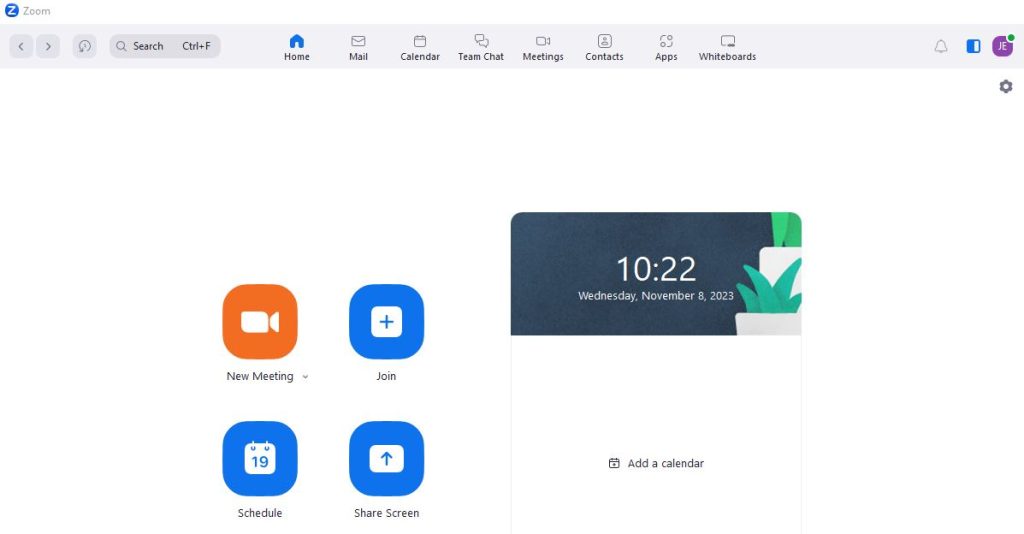
Here are the settings that we recommend you apply:
- Click Audio then ensure your microphone is set to your external mic and not your internal mic built into your webcam or laptop. If all you have is a built-in mic, you’ll of course need to use this, but we recommend picking up an external mic to greatly boost your audio quality.
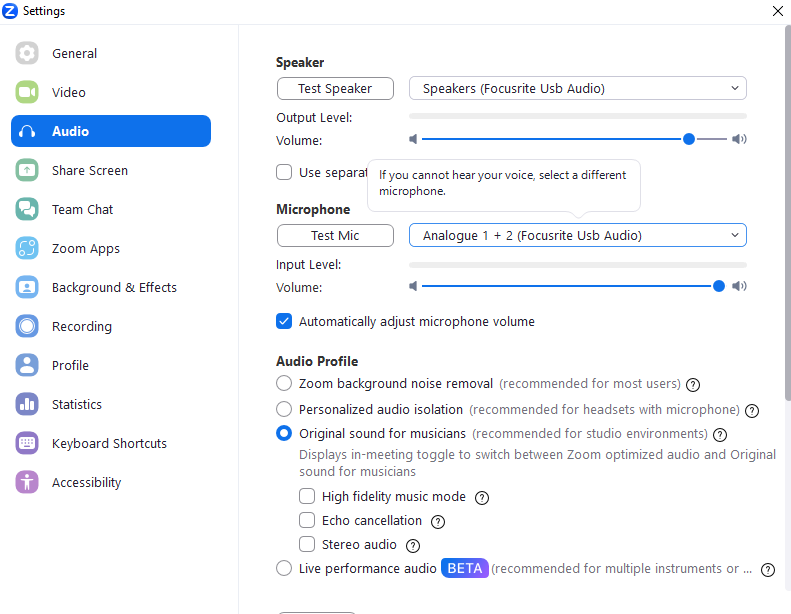
- Adjust the volume slider of your microphone so that when you speak, your audio level is not consistently at maximum as this can cause distortion. You may have a volume level knob built into your microphone that you can adjust instead.
- Set the speaker option to output to your headphones. This will be your computer audio if they’re plugged into your computer, or your microphone or audio interface if they’re connected to your hardware.
- Turn on Original sound for musicians. This increases the quality of the audio recording, just ensure that you enable this for each recording by clicking the option at the top left of your call window.
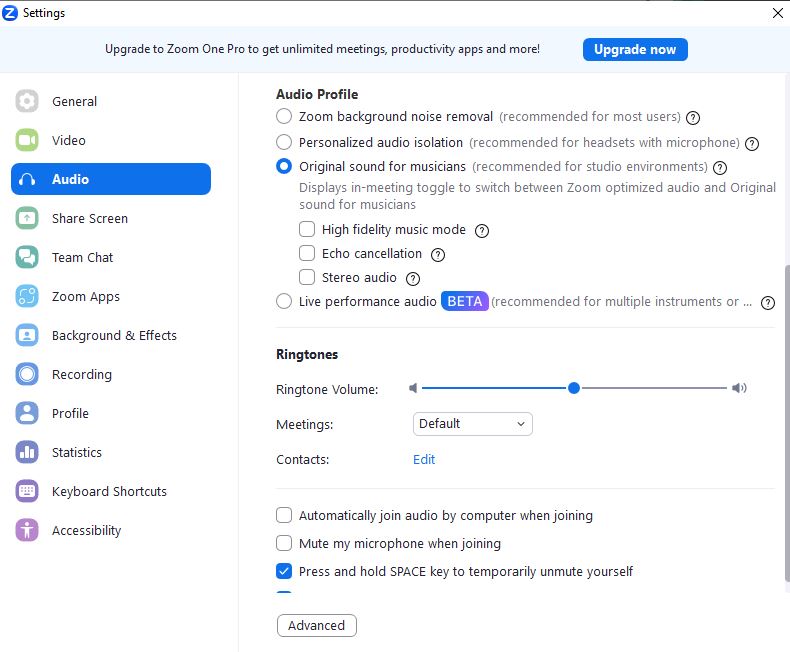
- Turn off Echo cancellation and Stereo audio.
- High-fidelity music mode can enhance the quality further but will put a strain on your network connection. So you can test this and see if it causes any issues. If it doesn’t, then leave this turned on.
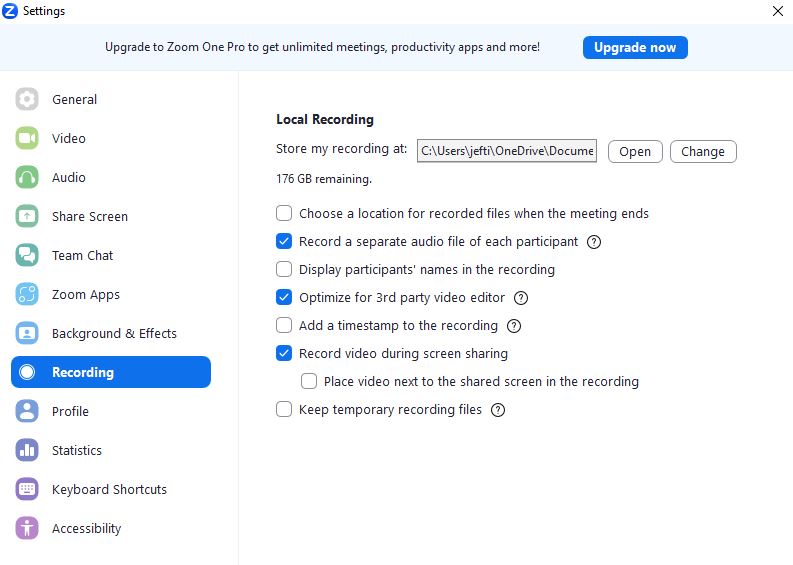
- Click Recording and turn on Record a separate audio file of each participant. This will give you one audio file for each speaker, rather than a single, combined file. This gives you much more control during the editing stage.
Then in addition to these settings, it’s important to position yourself in front of the microphone correctly, which in general is a hand-width gap between your mouth and the mic. Also, try to minimise any noise in your room.
For more details on capturing the best recordings possible, download our free eBook that goes into more detail on how to capture great recordings.
Video Settings
Now let’s get your Zoom settings for podcast recording set up to capture the best quality video possible:
- While you’re still in the Recording tab, turn on Optimize for 3rd party video editor.
- Turn off Display participants’ names in the recording. This removes the name label from the video feed, giving you more control during the editing stage.
- Open the Video tab and make sure the right camera is selected. If you have a higher-quality external camera, you don’t want Zoom recording with your built-in camera.
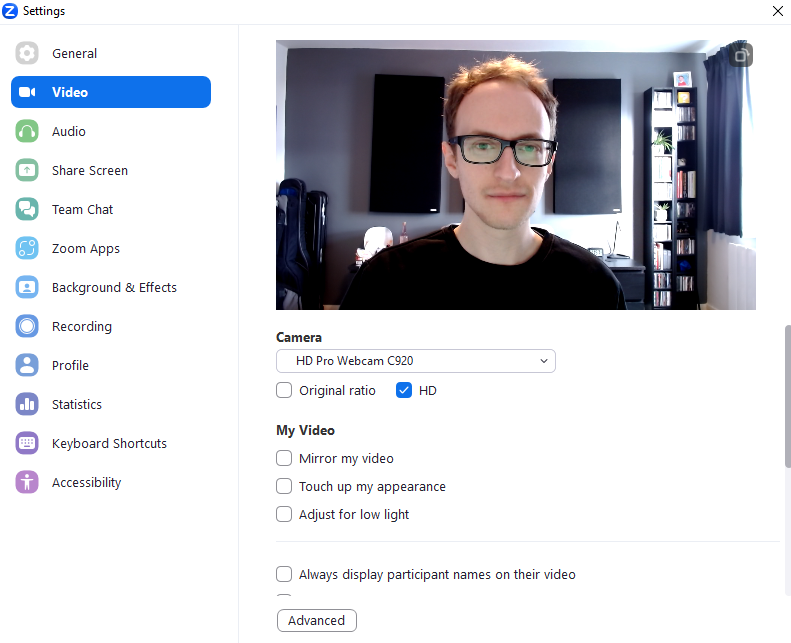
- Turn HD on if the option is available.
- You can also test the following settings – Mirror my video, Touch up my appearance and Adjust for low light. These are more subjective options based on your camera and your surroundings. Feel free to use these options if you prefer.
Now that’s set up, just don’t forget to turn Original Sound for Musicians to On in each call!
Bonus Recording Tip
Now, if you want to boost your audio quality even further, I’ve got one last tip for you. And this is without signing up to a paid recording platform like Riverside or Zencatsr.
Because Zoom records over the internet, the quality is reduced. To avoid this, I recommend recording your audio locally on your computer at the same time. You can do this using a free digital audio workstation (DAW) like Audacity, or you may have another DAW like Garageband installed already. You can open up your recording software select your mic and hit record on there as well as on Zoom.
Once your episode is finished, export the audio in .WAV format. Then, during editing, this is the audio you’ll use for your side of the conversation – it’ll just need lining up. You can ask your guests to do the same if they’re comfortable with doing so. This also is a great idea anyway because it gives you a backup recording.


