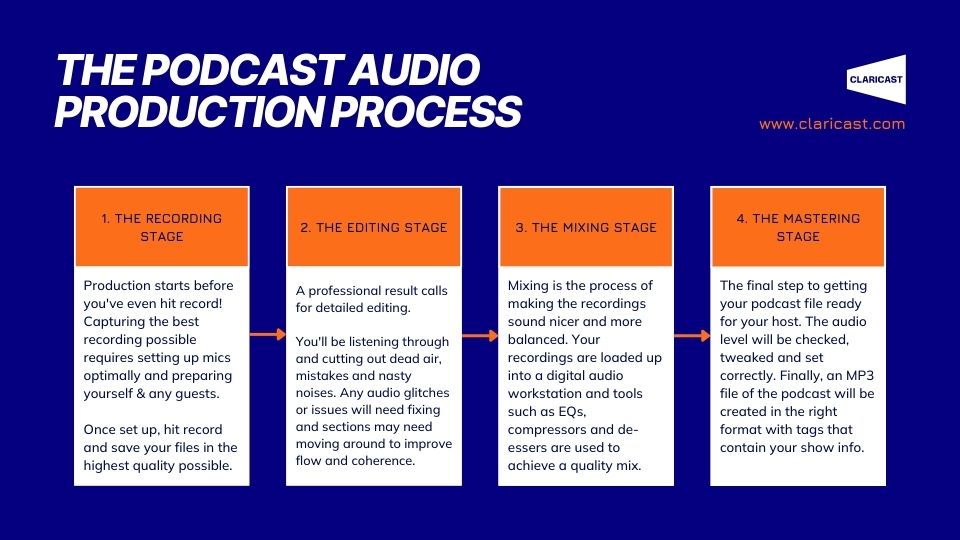
Once your podcast audio has been recorded, there are a few more steps to take before it’s release-ready. And one of those steps is the ‘mixing’ stage. If you’re unsure what audio mixing is, check out this explainer article.

To put it simply, the mixing stage is the bit where we make everything sound as good as it can. The quality of the recording plays a huge role in how the final episode will sound, but there are several things we can do to improve the balance and sound quality. This ensures the listener gets the best experience possible.
These are the areas we focus on:
- Making sure all the elements (speakers, music etc.) are balanced in volume
- Improving the sound quality for the listener
- Reducing noise, echo and other sounds that give a less professional result
Want to learn how to mix a podcast yourself? Keep reading!
HOW TO MIX A PODCAST
Once everything’s edited, it’s time to get mixing. You’ll need to have proficiency with digital audio workstation (DAW) software. Examples of DAWs include Audacity, GarageBand and Pro Tools. There are free DAWs available, while some of the higher-level software has a price tag.
If you’d like to try your hand with podcast mixing, use the DAW you’re familiar with, or try it on a free DAW first (like Audacity). At the end of this article, you’ll find a video tutorial so you can see the process in action.
Once you’ve mixed an episode, save a template of the plugins and settings used, as this will give you a good starting point for future episodes.
At Clarion, we follow these steps and guidelines to ensure that every episode is a joy to listen to.
- LEVEL BALANCING
While listening, manually balance track levels using the gain fader on each track to ensure volume is equal between speakers and intros/outros. Some sections or phrases may need to be balanced individually in areas where volume has increased or decreased significantly. It may be easier to do this during the editing stage.
- EQ AND FILTERING
Insert an equaliser (EQ) plugin onto each track. As with most vocal recordings, you’ll want to use a high-pass (low cut) filter to remove the unneeded low-end/bass. There are normally cuts required in the low-mid range (approx. between 300 Hz and 600 Hz) as well, to attenuate the ‘boxiness’ that is often present.
The vocal may need brightening up in the top end as well. Occasionally, the’ tinny’ recordings will require a small bump up of bass.
- COMPRESSION
Again, as with most vocal recordings, compression will be needed to smooth out levels throughout. Add a compressor plugin to each vocal track.
Normally, a low to medium ratio setting is recommended (2:1 to 4:1) with a soft knee. Use your best judgement though, as all recordings are different. It’s easy to go overboard and make the compression noticeable. Ideally, you want it to sound smooth – not squashed.
- DE-ESSING
Some subtle de-essing to reduce sibilance is recommended for most vocal tracks. Add a de-esser plugin to each vocal track (if you DAW has one). Set the reduction level to take away the harshness of the ‘S’ sounds, but not make them sound dull.
If your DAW only has the most basic effects, you may need to use an EQ instead, and reduce the high-mids (around 4000 Hz to 6000 Hz) a little.
- OTHER PROCESSING
You may also consider using other mixing techniques if a recording needs it. Multi-band compression can help tame swells in the low end and bass enhancers can improve ‘tinny’ recordings. A ‘gate’ plugin can be used to easily reduce low-level noise throughout.
If a recording has background noise/hum/his throughout, tools such as iZotope RX De-Noise, or Audacity’s built-in Noise Reduction plugin should be used to remove the noise.
The iZotope RX plugin is a pricey investment, but it also includes de-click, de-clip, de-plosive, de-reverb and other extremely useful tools for fixing these problems. It may be best to use these tools more surgically during the editing stage.
See the process in action
Is audio mixing not your forté but you want to ensure you’re getting a professional result? Get in touch today and let us deal with the technical side of things.


